Appliance Parts Installation Tips
On this page I will give you tips on appliance parts installation. This website
is mainly about diagnosing parts and doesn’t mention much about installing them.
This is because it would be nearly impossible to describe how to install all the
parts considering all the variables. Due of all these variables, I often find
myself replacing a part that is installed in a way that I have never seen before
or installing a part that I have never installed before. Not to mention changing
an electrical part with 25 wires on it, there is no way I could remember where
to plug the wires next time I replace that same part. This will be the situation
almost every do-it-yourselfer will be in because no matter how common the part
may be, it will probably be the first time they have installed it. This page is
all about tips on appliance parts installation. These are the tricks of the
trade I use when faced with installing a part I am not familiar with.
The very first tip I will give you is to always disconnect power before
attempting to install any part no matter if the parts is electrical or
mechanical. This I the most important tip of all because no do-it-yourself job
is worth getting hurt over.
Always read any installation instructions
that come with the new part if you are fortunate enough to have any. This is
very important because sometimes you will have to retrofit parts to fit your
model.
Electrical Appliance Parts Installation
Here are a few appliance parts installation tips
for electrical parts.
1. Always disconnect power. I know I already
mention but I can’t stress this enough.
2. Generally speaking, if the
part only has two wires it makes no difference which terminal they hook to. This
may not be true for every part such as diodes or any part that evolves DC
current. This is true however for switches, thermostats, and just about all
devices that run off of AC current (heaters, motors, or light bulbs).
3.
If the part has more than two wires things get a little more complicated. If
possible always remove the old part without unplugging any wires off of it. Then
install (fasten mechanically) the new part. Only after the new part is installed
should you unplug the first wire (only one) off the old part. Then plug it onto
the new part on the terminal marked the same. Do this until all the wires are
plugged into the correct terminal.
4. Sometimes the terminals are not
marked the same on the old parts as the new parts. If this is the case there
will almost always be installation instructions. So as I mention before, read
them, but still follow tip #3.
5. If tip #3 is impossible due to short
wires or any other reason, draw yourself a diagram to show the color of the wire
and the terminal that it plugs into.
6. Inspect wires and terminals for
any burnt spots, loose connections or damage. Make any necessary repairs.

Mechanical Appliance Parts Installation
Here are a few appliance parts installation tips
for mechanical parts.
1. Disconnect power from the appliance you are
working on even though the part you are installing is mechanical.
2.
Study the part you are going to replace. Take a picture if you think it will
help.
3. Make sure you understand at least to a certain extent how the
part works and what it does. This will make installing the new part easier.
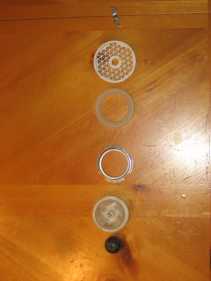
4. If getting to the part you want to install means you need to take off lots of other parts it is easy to loose track of what order the parts go back in. This is how I deal with that. I take the first part I remove and sit it in the floor some distance away from the appliance I am working on. Then the next part I will sit it next to the first one just a little closer to me. I do the same for all the parts I take off. When I get ready to reassemble the appliance, the closest part to me is the first one I have to reinstall and the furthest part from me is the last part I need to install. See example in picture.
5. If the part you are
installing requires glue, be sure to clean the surface that the glue is to be
applied. Note if you are installing a felt seal on a dryer that requires glue, I
recommend holding the seal in place (with clamps if possible) for a few minutes
before putting the front back on the dryer.
Refrigerator Door Gasket
Installation
In this section of this appliance
parts installation page I will talk specifically about replacing a refrigerator
door gasket.
1. Always soak the gasket in hot water for at least 10
minutes before attempting to install it. I always let it soak while I take the
old one off.
2. Remove the contents from the door to prevent the weight
from warping the door when the gasket is loose.
3. If the gasket is held
on with screws, do not fully remove the screws from the door just loosen them.
4. After the gasket is installed, take a heat gun or hair dryer and work
out any part of the gasket that is out of shape.
5. Once done apply a
thin film of Vaseline around the entire gasket. Note do not glob it on just a
thin film. Also it would be wise to apply the Vaseline at least once a year.
Refrigerator door gaskets can be purchased at AppliancePartsPros.com.
Return from Appliance Parts Installation Tips