Maytag Tub Seal Replacement
Replacing the Maytag tub seal on the Newton washer (two belts) is somewhat
difficult and requires special tool to do. But if you have the tool these are
the steps you take in doing this job. To check if the tub seal is bad, first
remove the front panel by removing the two screws from the bottom of the front
panel. If you have a newer model, prize the bottom clips with a screwdriver.
Then pull the bottom of the panel until the top clips release. Then start the
washer and watch for a leak around transmission where it goes through the tub.
If it does leak then the tub seal is bad and needs replacing. The part number
for the special tool I was referring to is 22038313.
Check out my Maytag tub seal replacement video
You will need these parts to complete this repair
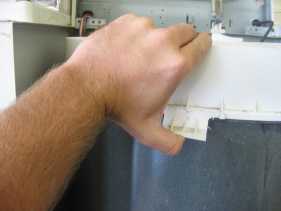
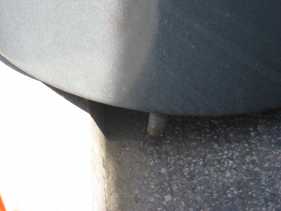
1. Remove the front panel (screws on each side). The front may also be held on
with clips under the bottom front corners. Slide a screwdriver between the front
and clip then you should be able to pull the front forward at the bottom. Once
you pull the bottom out a foot or so the top clips should release.
2.
Remove the two 3/8 screws pointing upward. This will allow you to lift the top
up.
3. Remove the agitator, by loosening the setscrew.
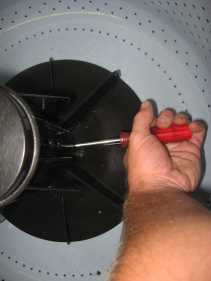
4. Remove the spanner nut (requires tool part number 22038313 and its left
hand thread).
5. Disconnect the inlet hose (not necessary on newer models).
6.
Remove the cover top off the outer tub (some snap off and some have a clamp all
the way around the tub).
7. Remove inner tub by lifting straight up and out.
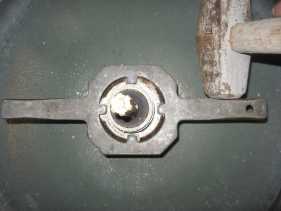
8. Remove the
(Torx20) setscrew in the mounting stem (the threaded stem that the spanner nut
was on). Note that some older models had allen set-screws.
9. Using the
same tool, part number 22038313
This tool and the mounting stem can be
purchased at AppliancePartsPros.com. , remove the mounting stem (also left hand thread and someone
may need to hold the transmission as you remove it).
But since I work alone this is how I hold it. If you have no one to hold it for you this will work.
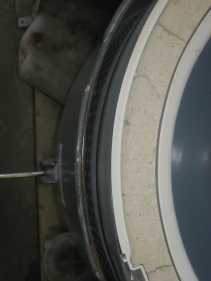
10. The outer tub is mounted to three legs. Remove the bolts that hold it on
and remove the hoses from the tub. Once done, remove the outer tub.
11.
Remove the rubber boot by pulling up and twisting.
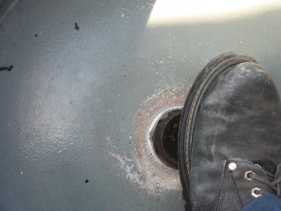
12. Prop the tub up
on something so that you won’t damage the stem that the drain hose connects to
and step on the seal to push it out.
13. Turn the tub back over and install the new one the same way (may want to
lube it with a small amount of soap and this will also be helpful when you
reinstall the boot).
Note that on the picture where I am pushing the seal out with my foot, all I am doing is pressing it out by placing my foot on
the seal and putting some weigh on the seal. When this is done the seal should
push right out. I do not intend for you to kick or stomp it out. The same goes
for putting the seal back in. Turn the tub upside down and press it in with your
foot by simply putting weight on it. Again I do not intend for you to kick or
stomp this seal in.
With all that being said you can do this by hand but
sometimes it is hard to get the seal out/in and I have found that pressing it in
with your foot is the easiest way to go.
Also it may be necessary to
lube the seal with a little soap to get it back in and you should clean the hole
that the seal seats into.
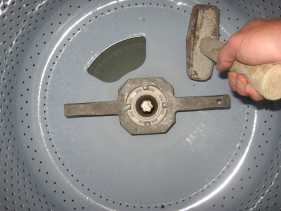
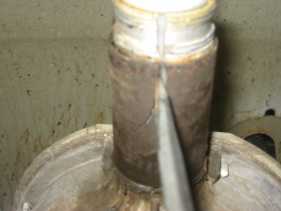
14. On the transmission there is a metal sleeve where the tub sits, remove it
(most of the time I have to break it off) then install the new sleeve.
15. Reassemble the washer replacing the seal, boot, tub bearing, sleeve,
mounting stem and spanner nut. All the parts that are required to replace the
Maytag tub seal come with these two part numbers 22204012 and 204013 These parts
can be purchased at AppliancePartsPros.com. Note that when reinstalling the mounting stem do not over
tighten. All you need to do is make sure that its all the way down on the boot
then tighten just a little more. Also note that when reinstalling the cover
(top) for the outer tub, be sure that the gasket is securely in place or the
washer will leak in spin.
When you reinstall the spin basket make sure
it is center. Meaning the gap between the spin basket and the tub should be the
same all the way around. If this isn’t done the washer will spin off balance.
Maytag tub seal replace video
Retrun From Maytag Tub Seal Replacement